
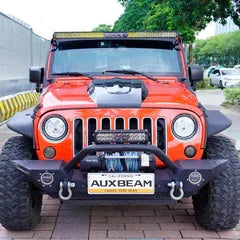

Using Auxbeam Switch Panels with Dual Batteries in an Overland Vehicle
The Auxbeam line of switch panels makes wiring and controlling electrical accessories easy – with one cable to a switch panel with 6, 8 or 12 circuits and one control box to connect the accessories too, installing and operating multiple electrical accessories in your vehicle couldn’t be much easier.
Not many vehicles have more electrical accessories than well-equipped overland/camping vehicles – in addition to accessories found on many vehicles such as driving lights, many overland vehicles have refrigerators, showers, campsite lights and more and the Auxbeam switch systems can really simplify the wiring in these vehicles.
The Auxbeam instructions call for connecting the system to a switched circuit in the vehicle so the system doesn’t draw power when the vehicle isn’t running, and connecting the accessory power directly to the vehicle’s starting battery. For most vehicles that’s the right way to do it, but what about using an Auxbeam switch system to control accessories to be used at the campsite when the vehicle isn’t running? You wouldn’t want to have to keep the ignition switch in the “on” position all the time while at the campsite, nor would you want to power the campsite accessories from the starting battery – either way you’re risking a dead battery when you try to start the vehicle to leave the campsite.
Many overland vehicles also have an auxiliary battery to power campsite accessories. Sometimes called a house battery or a kitchen battery, this battery is used to power accessories at the campsite so the vehicle’s main starting battery doesn’t get drained. The Auxbeam instructions only cover installation in vehicles with a single battery but with a few extra components it is possible to use an Auxbeam switch panel to control some accessories powered by the starting battery and other accessories powered by the auxiliary battery.
Configuring an Auxbeam system for a dual battery vehicle involves two steps:
1. Wiring the control box so it can be powered from a switched circuit when not at a campsite and powered from the auxiliary battery when camped.
2. Wiring the campsite accessories so they can be powered from the auxiliary battery but still be under the control of the Auxbeam system.
Powering the Auxbeam Control Box from a Switched Circuit or the Auxiliary Battery
A way to use the switch system with the ignition switched off is to install a switch to control the power to the control box. In the "driving" position, the switch would power the control box from a switched circuit and in the "campsite" position, the switch would power the control box from the auxiliary battery. The benefit of this is that for normal driving, any accessories controlled by the system will be powered off when the vehicle is not running, so they can’t be left on accidentally and drain the battery. And at the camp site, accessories can be used without the need for the ignition switch to be on.
The benefit of using the switch system in "campsite mode" is that the vehicle circuits that are powered by the ignition switch being in the on position will not be powered, which eliminates some drain on the battery while sitting at the campsite. Typically, you wouldn't be using "driving accessories" at the campsite such as driving lights, you would only be using campsite accessories so powering the system from the auxiliary battery protects the starting battery.
But forgetting to turn off campsite mode when you no longer need it could cause your vehicle battery to discharge if you switch on “driving” accessories, so it’s a good idea to have a reminder that the campsite mode is on. This can be done with a double pole double throw (DPDT) switch and a 12v LED indicator light; wired as per the next diagram, the LED will light whenever campsite mode is on and will serve as a reminder to turn off campsite mode when it is no longer needed.

The current draw for the various Auxbeam switch panel systems varies by model, but they generally draw less than 1/10 amp. That's a negligible drain on the auxiliary battery just for the control box, but to that the drain of the accessories switched on must be added. For example, if an accessory that draws 5 amps is to be switched on, it’s best for that accessory to be powered from the auxiliary battery when the vehicle isn't running – that accessory, if left on long enough, it may drain the battery past the point of being able to start the vehicle the next morning.
Powering the Campsite Accessories
Powering an accessory from the auxiliary battery is accomplished with a relay:

The green wire is one of those routed from a circuit in the control box in the engine bay and it powers the relay when that circuit is switched on. The red wire goes to the positive terminal of the auxiliary battery, and through the relay the auxiliary battery powers the accessory, in this case a campsite light. One relay is required for each control box circuit that’s to be used with auxiliary battery powered accessories. The output of the relay should be fused as shown in the diagram above.
The relay in the diagram is a standard Bosch type automotive relay. These draw about 175ma. when activated, which isn’t much, but there are relays that draw about 20ma. when activated, and solid-state relays that draw 5ma., so if you’re really trying to minimize drain on the main battery, lower-power relays are available. But 175ma. isn’t much to worry about.
To make wiring simple, multi-relay boxes with fuses are available, such as this 6-relay unit that can be found on Amazon: https://www.amazon.com/Waterproof-Pre-WiredIncluded-Universal-Automotive/dp/B0CDZCKBWM/ref=asc_df_B0CDZCKBWM/

Smaller relays with lower current draw are also available, such as this 4-relay board, also found on Amazon: https://www.amazon.com/HiLetgo-Channel-OPTO-Isolated-SupportTrigger/dp/B00LW2GM84/ref=asc_df_B00LW2GM84

These smaller relays may draw only 25 ma. or so compared to the larger Bosch relays that draw up to 175 ma. so if you're adding relays to a number of circuits these can save a bit of power but due to their smaller size and smaller connection points they’re a bit harder to use with larger gauge wire.
Here’s an example using one of the smaller relay boards. The relay board is mounted in a project box that was found on eBay and there’s an external fuse block, also found on eBay. The long coil of wire in this example allows the relays to be mounted in the rear of the vehicle, which is where the auxiliary battery is mounted in this particular vehicle. The wire is common 4-conductor trailer wire. The red wire hanging out of the box goes to the positive terminal of the auxiliary battery and in the close-up photo you can see how it's looped to all 4 relays. The black wire provides ground for operation of the relays. The campsite accessories connect to the right side of the fuse block.


Which Auxbeam Switch Panel to Use in an Overland Vehicle?
The wiring techniques described above can be used with any of the Auxbeam switch panels although some of the panels with more advanced features provide additional capabilities in an overland vehicle.
BC60, BA80 or any of the other single series panels.
The single series panels work just fine with the wiring described above, but having only one switch panel, all control of accessories will have to be from that single panel. At the campsite it may be a bit less convenient to have to use a switch panel near the driver’s seat to operate campsite accessories.
AR-600, AR-800 Bluetooth.
The switch panel systems with Bluetooth capability work very well in an overland vehicle – the smartphone app can be used to control the campsite accessories even while sitting around the campfire.

Ra80x2 dual panel.
The RA80x2 system includes two switch panels; in the photo below the second panel is mounted to the roll bar in the back of the Jeep, next to the Trail Kitchen/fridge. This is a great place to operate the campsite accessories from.

The photo above also shows where the auxiliary battery is mounted, and if you refer back to the photo above of the small relay implementation the long coil of wire was used reach the relays, which are mounted in the back of the Jeep near the auxiliary battery. This Jeep also has solar charging for the batteries, which works fine with the wiring described in this article.
AC1200 with app and remote.
For a vehicle equipped with many overland accessories, such as a refrigerator, campsite lights, water pump for a sink, another water pump for a shower, an inverter to supply AC power, cabin lighting and more, the AC1200 with its 12 circuits is the ultimate system. It’s got both Bluetooth app capability as described above and a hardware remote, which is also perfect for sitting around the campfire.

Whichever Auxbeam switch panel you decide to use, the wiring techniques described above will prepare protect your starting battery from discharge and prepare your dual battery overland vehicle for unlimited adventure time off the grid.